| |||
|
Troubleshooting Guide
Troubleshooting Guide > Battery Charger Does Not Work
Battery Charger Does Not Work
Plug the charger into the wall outlet and see if a light illuminates on the charger. If no light illuminates on the battery charger then test the wall outlet with another electrical appliance that is plugged in and working in a different wall outlet. If this appliance no longer works when plugged into the wall outlet that the battery charger is plugged into then the wall outlet is not energized with electricity and the circuit breaker which covers it may be tripped or faulty or the wall outlet itself may be faulty.
(No Tools Needed) If the battery charger is plugged into the wall, unplug it. Plug the battery charger into the battery charger port on the vehicle and look for an illuminated indicator light on the battery charger. If an indicator light on the battery charger illuminates then the wiring and wiring connectors going to the charger port are good and the charger port itself is good. Not all battery chargers have an indicator light that will illuminate when the charger is only plugged into the vehicle, so if the light does not illuminate then a secondary Voltage test with a multimeter should be performed as described below. (Tool Needed: Multimeter) If you have a multimeter the battery charger
port's Voltage can be tested. The Voltage level present at
the charging port should be the same as at the battery pack. If the charger port
has male terminals then great care needs to be taken to avoid short circuiting
the terminals to each other or to the charger port's housing if it is metal.
(Tool Needed: Multimeter) After testing the charger port and confirming that it has Voltage then the battery charger can be tested. If the charger port has no Voltage then that issue will need to be fixed before testing the battery charger. To test the battery charger to confirm that it is recharging the battery or battery pack, first test the Voltage of the battery or battery pack to confirm that it is below a 100% state of charge and that it needs to be recharged. We have a Battery State of Charge Chart to help with determining if the battery or battery pack needs to be recharged. Once it has been determined that the battery or battery pack needs to be recharged, plug the battery charger into the vehicle's charger port, and then plug the battery charger into the wall. Next test the Voltage of the battery pack with a digital multimeter to see if its Voltage is slowly climbing. The multimeter should be set to a DC Voltage range that allows reading the tenths or hundreds of a Volt of the battery or battery pack. If the battery or battery pack's Voltage slowly climbs to a higher number then that indicates that the battery charger is recharging the battery or battery pack. Continue to charge the battery or battery pack until the light on the charger indicates that it is fully charged, then test the battery or battery pack Voltage to see if it is at a 100% state of charge as specified in our Battery State of Charge Chart. If the charger is not charging the battery or battery pack up to a 100% state of charge then the charger is faulty.
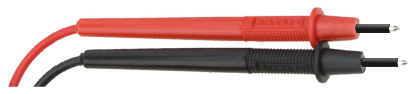
Wrap electrical tape or install heat shrink tubing around the sides of the metal probes leaving only the ends exposed. Be careful not to touch the multimeter probes to both the terminal pins and side of a metal plug at the same time.
|
 Check
The Wall Outlet For AC Power
Check
The Wall Outlet For AC Power