City Bug® Electric Scooter Owner's Manual and Safety Information.

Brought to you by ElectricScooterParts.com

It is important to read and follow all the instructions and safety information contained in this Owner's Manual prior to use.

  • Always wear a helmet
  • Do not operate at night
  • Comply with all local laws and regulations
  • Do not use in wet conditions
  • Do not ride in off-road conditions Recommended for riders 16 years of age or older
  • Check all folding locks and releases before use
  • Ensure battery is properly charged before use
  • Practice riding the City Bug in a large, open area, free of vehicles, obstacles and pedestrians
Important Safety Information.

It is important to read and follow the instructions and safety information contained within this Owner's Manual prior to use.

General Information:

Always wear a helmet when riding.

This product is not a toy. It is not recommended for use by persons younger than 16.

Operators must comply with all local laws and regulations. Check with your local police or department of motor vehicles to determine local requirements.

Your insurance policy may not provide coverage for accidents involving this product. Contact your insurance agent.
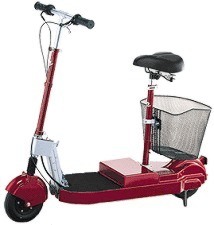
City Bug requires skill to operate safely. Practice starting, stopping and turning in a large open area, free of vehicles, obstacles and pedestrians. Only after the operator is competent in the use of the product should it be ridden in crowded areas.

Do not operate the City Bug electric scooter at night. City Bug is not equipped to be operated in the dark nor in low light conditions. It may not be visible to other vehicles or pedestrians in these conditions.

Do not operate the product near children. When approaching pedestrians, announce your presence to minimize sudden, unexpected moves by pedestrians.

The product design allows for use by only one person. Do not carry additional people. Do not carry any items on the City Bug electric scooter, unless they are securely placed in the basket.

Do not tow or pull the City Bug electric scooter behind a vehicle, bicycle or pedestrian.

Do not use the City Bug electric scooter to pull or tow anything.

Riding Terrain:

Ride only on smooth, hard, flat surfaces. The City Bug electric scooter is not intended for off-road or hilly conditions.

Use caution when approaching curbs, uneven pavement, potholes or similar conditions. The small front wheel cannot roll over objects higher than about two inches. You may fall when running over these items.

Do not ride the City Bug electric scooter downhill for extended periods. This may increase wear of the brake lining and adversely affect the ability to stop the unit.

Mechanical Systems:

Check all joints, hinges and quick releases to ensure the City Bug electric scooter is properly assembled. Stop using the product immediately if any joint, hinge, or quick release becomes loose. Correct the looseness prior to resuming the ride.

The electric motor, batteries, and controls can be damaged if exposed to water. Do not allow City Bug to be used in the rain, nor to be driven through puddles of water.

Maintain proper air pressure in the tires. Low air pressure makes the motor work harder, reduces ground clearance, and wears the tires.

If the brake lever touches the handlebar grip, stop use of the product until the lever is adjusted.

Always deflate the tire before disassembling the wheel. Failure to deflate the tire could cause the wheel to come apart explosively.

Battery Information:

Completely charge the battery for City Bug prior to the first use. Refer to the Battery System and Charger section for more information regarding battery use.

Use caution when recharging the batteries. Do not recharge in an area that will allow City Bug or the charging unit to become wet. Recharge only in an area that is well ventilated. Keep children away from the City Bug electric scooter while it is being recharged.

Stop use of the product or the charging unit if any wire becomes worn, broken, or damaged in any way. Have the product inspected and serviced by an authorized dealer.

Do not modify the electrical controls or wiring. Use only motors, batteries, and charging units supplied or approved for the City Bug electric scooter.

Do not use the City Bug electric scooter battery to power any other equipment.

Do not block the air vents on the charging unit. If blocked, the charging unit may overheat and create a fire hazard.

Replace the fuse on the charging unit with a fuse of the same size and type.

Additional Safety Information:

Adjust the seat and handlebar height to provide a comfortable and secure riding position on the City Bug electric scooter. The rider's hands must be able to easily grasp the handlebar controls. Feet must rest comfortably on the foot rest area.

When finished riding the City Bug electric scooter, remove the key and take it with you. This prevents unauthorized use of the product, especially by children.

After folding the product, be certain the steer tube is securely locked into the seat tube latch before carrying. While carrying the product, use caution to maintain your balance, particularly on stairs.

If service is necessary, contact your authorized City Bug electric scooter service center. Do not attempt to service the electric scooter yourself. Service by anyone other than an authorized service center will void the Warranty agreement.

City Bug Overview.

 Steer Tube Quick Release and Seat Tube Quick Release Levers open and close for easy height adjustment

 Steer Tube Latch secures the steer tube for storage

 Steer Tube Collar allows for alignment of handlebar

 Serial Number Location for future reference

 Folding Mechanism Latch pressing the lever forward releases the steer tube for folding Seat

 Tube Folding Latch pull up lever to fold seat tube forward

 Latch Release Button press to unlock steer tube

 Seat Tube Collar allows for alignment with the steer tube latch

 Lower Latch Lever pressing forward locks the steer tube upright


Assembly Instructions.

Scooter Assembly

Depress and hold the latch release button on the seat tube. Free the steer tube and extend it to a vertical position.

Lift the seat tube to an upright position until the latch mechanism engages and securely locks the seat tube in a vertical position.

Extend the steer tube to its full, upright position and check that all cables are untangled.

Apply firm pressure to the lower latch lever, securely locking the steer tube in an upright position.

Handlebar Assembly

Place both halves of the handlebar in their proper holes. Insert and rotate the handlebar halves until the locking buttons snap into holes in the stem and are securely set. (see diagrams)

Battery Assembly

Place the battery into the battery compartment. Attach the motor lead to the battery lead. IMPORTANT: Completely charge the battery before riding the City Bug electric scooter for the first time. Disconnect the battery from the motor lead when not in use. Refer to the Battery System and Charger section of this manual for additional specifications regarding use. Basket Assembly Open the basket fully and press the bottom of the basket into place. Rotate locking bar to the inside of the basket locking it into the slot. Secure the basket hook to the rear clamp located on the seat tube.

Height Adjustment

The next step is to ensure the handlebar and seat tube are adjusted for a comfortable riding position.

The handlebar and seat tube height can be easily adjusted for each rider. To adjust the height, open the quick release levers on the steer tube and seat tube. The cam lever is pointing straight out when in the open position. If necessary, tighten or loosen the adjusting nut so the quick release cam lever first meets resistance when in this position. Raise or lower the handlebar and seat tube to the preferred height. Firmly push the quick release cam lever down to the closed position.

IMPORTANT: Make sure the "MAX-HT" mark of the seat post cannot be seen above the seat tube.

Folding Instructions.

The City Bug electric scooter can be folded in a few easy steps. The scooter is easy to transport when folded.

Battery

The battery can be removed by disconnecting the battery lead from the motor. The removal of the battery is optional, since the battery can remain in the battery compartment during transport, charging and storage.

IMPORTANT: If storing the City Bug electric scooter for a long period, disconnect the battery from the motor and recharge the battery fully at least once every month to preserve battery life.

Refer to the Battery System and Charger section of this manual for additional specifications regarding use.

Handlebar and Seat Height Adjustment

Lowering the handlebar and seat height will ensure the most compact disassembled size, but it is not required.

  • Lower the handlebar and seat tubes by opening the quick release levers on the steer tube and seat tube. After lowering the handlebar and seat tubes as far as possible, firmly close the quick release mechanisms.
  • Press in the locking buttons and release the handlebar halves. The handlebar halves will be retained by built in elastic bands.
Body
  • Remove basket.
  • Pull the seat tube latch upward and hold, releasing the locking mechanism.
  • Fold the seat tube forward until it is in a horizontal position.
  • Firmly push the folding mechanism latch forward, releasing the steer tube.
  • Turn the handlebar clockwise until the steer tube latch is lined up to properly fit into the seat tube slot.
  • Insert the steer tube latch into the seat tube, making sure it securely locks into position.
Before You Ride Checklist.

Before riding the City Bug electric scooter, be sure you carefully follow the checklist below:

  • Read and understand the Important Safety Information section of your Owner's Manual
  • Make sure the battery has been fully charged Check that the battery lead is properly connected to the motor lead
  • Make sure the seat and handlebar heights are adjusted to your preference (refer to the Assembly section)
  • Check that the key is turned to the "off" position
  • Carefully check all joints, quick release levers, locking buttons and latches to ensure each is secured
  • Make sure the tires are properly inflated
  • Check the brake lever for proper function
How to Ride the City Bug Electric Scooter.

It is important you understand how to operate the scooter. Carefully follow these steps:

  • Turn key to "on" position
  • Apply and hold the brake lever (on the left) firmly; the City Bug scooter will not function until this operation is performed
  • Release brake lever
  • Slowly apply throttle (on the right) while keeping your hand near the brake lever at all times (see note below)
  • Gradually apply throttle until desired speed is reached

NOTE: As an added safety feature, the City Bug scooter's micro-computer automatically cuts off power to the motor whenever the brake is applied. The motor regains power after a short pause. To allow for this pause, do not apply throttle immediately after applying the brake.

Battery System and Charger.

Only use the battery charging unit that was supplied with your City Bug electric scooter. Use of any other battery charging unit or equipment voids your warranty and may result in severe damage to the battery and scooter, and may cause a fire hazard. The battery can be recharged either while in the City Bug electric scooter's battery compartment or when removed. To recharge the battery:

  • Connect the battery charger lead to the charging unit (see Battery Overview, page 10)
  • Make sure the voltage switch on the charging unit is set to the appropriate voltage and plug the battery charging unit into a wall socket. (See figure on right. In the United States and Canada, you will need 115V. In Europe and other countries, you will need 230V or higher.)
  • Turn the charging unit power switch to the ”on“ position.

Light Indications

The green light indicates the power is on. The steady red light indicates charging. The flashing red light indicates fully charged.

Please Note:

The battery system utilizes a fuse. A spare fuse is included in the battery compartment. The battery will be fully charged after five hours. This will be indicated when the red light on the recharging unit starts flashing.

Once the battery is fully charged, it will automatically start to drain the charge.

Over time, after repeated charging, the scooter battery will fully charge to lower levels. This is normal for a lead acid battery. If you notice your City Bug scooter battery is not holding a charge, you may need to purchase a new battery for your City Bug scooter.

Basic Maintenance.

With proper care and maintenance the City Bug electric scooter has been engineered to provide years of trouble-free riding enjoyment.

We recommend occasional inspection of the seat tube latch to ensure it is free of dirt and debris. If the mechanism seems stiff, apply a few drops of oil to the springs in the latch release and the latch release button.

Micro-computer Warning Lights and Tones.

Every time you turn on the City Bug electric scooter, you should hear a single ”beep“. This indicates the built-in acceleration micro-computer has done a self-diagnostic test and all systems are normal. If you do not hear a beep and/or none of the LED lights come on, refer to the Trouble Shooting section for possible causes and solutions.

If you try to engage the throttle lever before you depress the brake lever, the micro-computer will beep. This is a safety feature that prevents accidental throttle engagement.

If you hear a continuous beeping when you turn on the power, the throttle is activated. Immediately turn off the power and check to see if the throttle cable is blocked or extended in a manner that would activate the throttle. This situation most often occurs if the rider is applying the throttle before turning the power on.

One "beep" every 3 seconds means the battery level is less than 50%.

One "beep" every 1 second means the battery level is less than 30% and the battery should be recharged immediately. Refer to the Battery System and Charger section for more information.

Under certain circumstances the City Bug Scooter's micro-computer will automatically shut the motor off to ensure the integrity to the drive system. The following lights will indicate the problem and suggested actions.

If the indicator is a flashing yellow light it means 'high motor temperature' and the suggested action is to turn power off; wait 60 seconds then turn power on.

If the indicator is a flashing green light it means 'too much current to motor' and the suggested action is to turn power off; turn power on.

If the indicator is a flashing red light it means 'battery power critically low' and the suggested action is to turn power off and recharge battery immediately.

Trouble Shooting.

For trouble shooting problems with the micro-computer, refer to the Micro-computer Warning Lights and Tones Section.

Below are tips on how to handle other situations you may encounter.

Problem 1: The key is turned to the "on" position, but the LED lights do not come on and there is no self-diagnostic test "beep" tone.

Possible Cause Suggested Action
The battery lead is not connected to the motor lead Connect the battery lead to the motor lead
The battery wires are not connected Unzip the battery bag and attach the wires
The battery has discharged beyond the point of recharging Replace battery
The fuse is not functioning properly Replace fuse

Problem 2: The key is turned to the "on" position, the LED lights go on and the motor responds to the throttle, but the rear wheel does not move.

Problem 3: The key is turned to the "on" position, and the LED lights go on, but the motor does not respond to throttle.

Possible Cause Suggested Action
The battery lead is connected to the charger Disconnect the charger and attach the motor lead to the battery lead

Problem 4: The motor keeps turning the rear wheel even after the throttle has been released.

Possible Cause Suggested Action
The throttle did not return to its original position Apply the brake, turn off the power and check to see whether the throttle is obstructed or stuck
The throttle cable extended too far, activating the motor Lower the handlebar height so that the the motor throttle cable is not extended too far

Problem 5: Cannot properly fold the City Bug scooter.

Possible Cause Suggested Action
The seat post direction is incorrect, preventing the steer tube latch from properly engaging the steer the seat tube receptor Loosen the bolt on the seat tube collar and rotate the seat post until tube latch securely engages the seat tube slot.

Tighten the bolt on the seat tube collar.

The steer tube latch position is off, preventing it from properly fitting into the seat tube slot Loosen the screw on steer tube latch. Rotate, raise or lower the latch until it properly fits in the seat tube slot.

Tighten the steer tube latch screw.

Problem 6: A portion of the unit hits the ground while riding.

Possible Cause Suggested Action
The rear tire air pressure is too low Add air to the rear tire

Problem 7: The brake is too strong or too sensitive.

Possible Cause Suggested Action
The brake cable is too tight Rotate the brake cable adjuster towards the brake lever

Problem 8: The brake is too weak.

Possible Cause Suggested Action
The brake cable is too loose Rotate the brake cable adjuster away from the brake lever

Problem 9: The throttle is too sensitive.

Possible Cause Suggested Action
The throttle cable is too tight Rotate the throttle cable adjuster towards the throttle lever

Problem 10: The throttle has too much lag.

Possible Cause Suggested Action
The throttle cable is too loose Rotate the throttle cable adjuster away from the throttle lever

Problem 11: The handlebar is not aligned with the front wheel.

Possible Cause Suggested Action
The steer tube collar is loose Loosen the bolt on the steer tube collar. Align the handlebar with the front wheel. Securely tighten the bolt on the steer tube collar.

Specifications.

City Bug Electric Scooter

Dimensions:
Folded L=39" W=10" H=10" Unfolded L=43" W=19" at the handlebar; H=27.5" at the seat; 36" at the handlebar
Weight:
48 lbs. including battery
Maximum speed:
Up to 14 MPH
Average distance per charge:
13 Miles
Carrying capacity:
220 lbs.
Motor:
24V 300 Watt DC; 0.39 hp
Tire size:
200x50 mm (Pneumatic)
Battery:
Lead-Acid 24V 12A X2
Recharge time:
5 hours
Brake:
Rear drum-type
Drive:
Belt
 
Charger
Input:
115/230V AC 60/50Hz
Output:
24VDC/2A (24VDC/1.6A-4A OK)